Part I: Part I: Requirements / Installing Operating Systems
Part II: Part II: Setting up Active Directory
Part III: Part III: Joining Windows 10 to Domain, Mapping Shared Folder, & Quick Kali Configuration
Part IV: Part IV: Attacking
Welcome back to LLMNR Poisoning. This is Part II of the series of posts providing (hopefully) a thorough tutorial on conducting this attack. Now that we have our lab environment installed. We need to configure certain aspects. This post will solely be dedicated to setting up our Active Directory and adding a user who will be our victim. It’s gonna be another wall of images with some text thrown in there, follow along closely and you won’t have any issues. Remember when I created the user Jon on my Windows 10 machine? Yup — still sticking to a Game of Thrones theme! Let’s get to it.


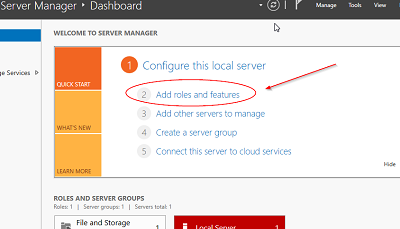
First off I’m going to change my computer name to WESTEROS. Right click on the Windows Icon > System. We’ll be presented with a System information window, click Change Settings in the Computer name section. Then in this new pop-up click Change, and set it to whatever theme you’re going for.


There will be some a few restarts needed with configuring our AD server. They’re usually quick though, so make sure to reset the machine as needed.
Now we’re going to set up Active Directory and promote it to a Domain Controller.


After a successful installation, we will now promote the server to a domain controller.
Creating our domain:

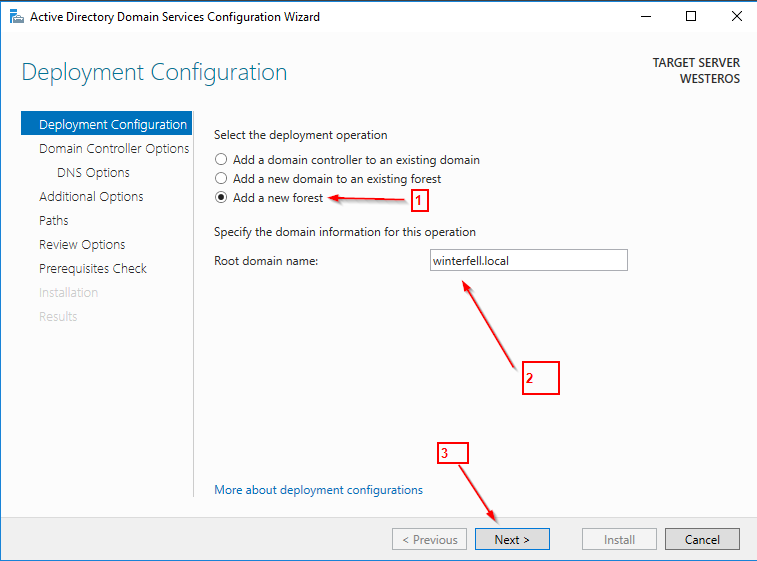
Now is the time to create your domain name. First, click Add a new forest. I went with winterfell. So I named it winterfell.local. Then click Next.


After making the appropriate selections as pointed out by the red arrows in the images, you should have created a new domain. Now we’ll add a user!
Adding a user:
Adding a user is very easy. Windows Server has a nice Tools icon on the Server Manager window which can allow for quick access to many features. We’ll click Tools > Active Directory Users and Computers.


That’s it. You’ve just created a user! Let’s add a Shared Drive now that we’re here.
Adding Shared Drive:


Now go back to the Server Manager.


You can name the share whatever you want. For simplicity, I went with hackme.


And just like that we’ve created a domain, a domain user, and a shared folder. Next post will be configuring the Windows 10 machine and the Kali machine.

